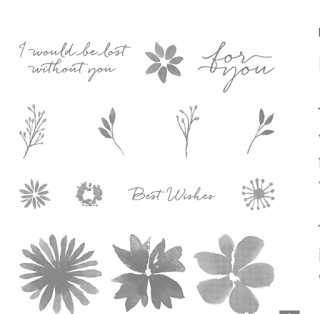
Covered Mini Notepads using Blooms and Wishes
Gwen Maghdour, Independent Stampin'Up Demonstrator
The notepads I used were A7 size 4 x 3 inch and two were used for each project.
Two pieces of DSP to cover the notepads, each measuring 31/16 x 53/4 inch.
Coloured card measuring 63/4 x 41/2 inch scored at 31/4 and 31/2 inch.
Whisper white card 41/4 x 3 inch, two of these.
Coloured card 4 x 23/4 inch, two of these.
Whisper white card for stamping image on 33/4 x 21/2 inch, one of these
Ribbon for fastening.
Remove any original covering from the notepads and cover with the two pieces of DSP attaching to the back of the notepads with double sided tape.
Attach both notepads to the coloured cardstock as near to the scored lines as possible without overlapping them, this will leave about a 1/4 inch gap between both notepads, as shown in picture.
Turn this over so that the notepads are facing downwards and attach a strip of ribbon to the width of the cardstock and half way down leaving enough length of ribbon to tie a bow. this will close your notepads together.
On the single piece of whisper white cardstock I stamped out the sentiment in the middle, sentiment from Layering Love stamp set and then around that I created my design using the small flower and foliage images from Blooms and Wishes stamp set. The colours that I chose were those that I felt would compliment my choice of cardstock.
This was attached using snail adhesive to the mat of coloured card stock and then this was attached using dimensionals to the white card stock. Attach this with double sided tape to the front of your cover.
There is still two pieces of card stock left, one white and one coloured, attach these together using snail adhesive and then adhere with double sided tape over the ribbon on the back cover.
This completes the project and I hope you have enjoyed it. If you would like to purchase any of the products used simply click on any of the images below and this will take you to my online shop. Don't forget to use the current Hostess Code for February V4HSK9TF for any orders less than £150 in order to become a member of my monthly Hostess club and receive a thank you gift from me.
Thank you for stopping by
Gwen x
Product Product List


No comments:
Post a Comment